Estimated reading time: 8 minutes
This is a dessert that defies expectations and combines the deliciousness of ice cream with the crispiness of a fried treat - Fried Ice Cream! If you've never experienced this treat before, get ready for an incredible combination of taste and texture.
Table of contents
- Discover the Delightful World of Fried Ice Cream: A Tantalizing Recipe
- What is Fried Ice Cream?
- Who invented Fried Ice Cream?
- What diet or dietary lifestyle does this recipe adhere to?
- What is the cost of this recipe?
- What is the preparation time for this recipe?
- What is the cooking time for this recipe?
- The Perfect Fried Ice Cream Recipe
- Ingredients
- Instructions
- Web Story
- Final Thoughts
Discover the Delightful World of Fried Ice Cream: A Tantalizing Recipe
Hey there, fellow foodies! Welcome back to Life's Little Sweets. I am thrilled to share with you a scrumptious treat that will take your taste buds on a rollercoaster ride of flavors - Fried Ice Cream! Imagine the magic of ice cream meets the crispy indulgence of fried desserts. Let's dive right in and explore this mouthwatering dessert and learn how to make it right in the comfort of your own kitchen.
What is Fried Ice Cream?
Fried Ice Cream is a delightful dessert that combines the best of both worlds: the creamy, dreamy goodness of ice cream and the satisfying crunch of a fried coating. It might sound like an impossibility, but trust me, it's real, and it's delicious! With its crispy exterior and a cool, creamy center, Fried Ice Cream is sure to wow your friends and family.
Who invented Fried Ice Cream?
The invention of Fried Ice Cream is a bit of a culinary mystery, and there is no clear consensus on its origin. Various cultures and countries have claimed to be the birthplace of this delightful dessert.
One theory suggests that Fried Ice Cream originated in Asia, particularly in China or Japan. In this version, the dessert was created by rolling balls of ice cream in a mixture of crushed nuts or breadcrumbs and then quickly deep-frying them to create a crispy outer layer while keeping the ice cream inside frozen. I've had fried ice cream with Panko breadcrumbs before, and it is delicious!
Another theory attributes the invention of Fried Ice Cream to Mexico. Some say that it was first served at the 1940s World's Fair in Mexico City, while others believe it may have been part of traditional Mexican cuisine even earlier.
Despite the uncertainty surrounding its origins, Fried Ice Cream has become a popular dessert in various parts of the world, and many restaurants and cuisines have put their unique twists on the dish. It remains a beloved treat enjoyed by people of all ages, with its crispy, fried exterior perfectly complementing the creamy goodness of ice cream.
What diet or dietary lifestyle does this recipe adhere to?
The Fried Ice Cream recipe described does not adhere to any specific diet or diet lifestyles. It is a classic dessert recipe that combines ice cream with a fried coating, making it a delicious indulgence for anyone looking to enjoy a sweet and crispy treat.
It's worth noting that certain ingredients in the recipe can be modified to accommodate specific dietary preferences or restrictions. For example:
- Vegetarian: The recipe, as described, is suitable for vegetarians, as it doesn't contain any meat or animal-derived ingredients.
- Gluten-Free: To make the recipe gluten-free, you can use gluten-free cornflakes or graham crackers for the coating. Ensure that the ice cream you choose is also gluten-free.
- Nut-Free: If you or your guests have nut allergies, you can use crushed cereal or cookies that do not contain nuts for the coating.
- Egg-Free: To make the recipe egg-free, you can explore alternative binding agents for the coating, such as a mixture of non-dairy milk and cornstarch.
Always check the ingredient labels and allergen information, especially if you or your guests have specific dietary needs. Modifying the recipe accordingly can allow individuals following certain diets, such as gluten-free or vegetarian, to enjoy this delectable dessert without any concerns.
What is the cost of this recipe?
I can give you a rough estimate of the overall cost of the Fried Ice Cream recipe based on the common ingredients listed:
- 1 quart of ice cream: $4 to $6
- 2 cups crushed cornflakes or graham crackers: $2 to $4
- 1 teaspoon ground cinnamon: $2 to $3
- 2 large eggs: $1 to $2
- Vegetable oil: $3 to $5
Optional toppings like honey, chocolate sauce, whipped cream, and maraschino cherries will have additional costs, but they can vary widely based on the brands and quantities you choose.
Taking the rough estimates above into account, the total overall cost of the Fried Ice Cream recipe could be around $12 to $20, depending on the specific ingredients you purchase and their prices in your area.
Please note that these are approximate costs and can vary based on various factors. Always check the prices at your local stores to get a more accurate estimate of the overall cost for your specific location. (recipe cost section last updated 7/26/2023)
What is the preparation time for this recipe?
The prep time for the Fried Ice Cream recipe can vary depending on the efficiency and experience of the cook, as well as any additional steps they might take during the process. As a general estimate, the prep time for this recipe is around 15 to 20 minutes.
Here's a breakdown of the prep time for the recipe:
- Preparing the Ice Cream Balls: Approximately 5 minutes
- Coating the Ice Cream Balls: Approximately 5 minutes
- Freezing the Ice Cream Balls: Approximately 1-2 hours (passive time)
Keep in mind that freezing the ice cream balls is a crucial step to ensure they are firm and won't melt quickly during frying. You can also make the ice cream balls in advance and store them in the freezer until you are ready to fry and serve them.
Overall, this Fried Ice Cream recipe is relatively quick and easy to prepare, making it a perfect choice for a delightful dessert without spending too much time in the kitchen. Enjoy the magic of Fried Ice Cream in no time!
What is the cooking time for this recipe?
The cook time for the Fried Ice Cream recipe can vary depending on the number of ice cream balls fried at once and the heat of the oil. As a general estimate, the cooking time for frying each ice cream ball is very short, approximately 15 to 20 seconds.
Here's a breakdown of the cooking time for the frying step:
- Frying each Ice Cream Ball: Approximately 15-20 seconds
Since the frying process is quick, it's essential to have all your ingredients and equipment ready before starting. Additionally, it's best to fry the ice cream balls in small batches to ensure they fry evenly and don't cause the oil temperature to drop drastically.
Remember that the goal of frying the ice cream balls is to create a crispy outer coating while keeping the ice cream inside frozen. The short cook time helps achieve this balance.
After frying, you can serve the Fried Ice Cream immediately, topped with your favorite toppings like honey, chocolate sauce, whipped cream, and maraschino cherries. Enjoy the wonderful contrast of textures and flavors in this delightful dessert!
The Perfect Fried Ice Cream Recipe
Let's get to the best part - the recipe! This Fried Ice Cream recipe is straightforward and will yield a dessert that rivals the ones you find in your favorite restaurants.
Ingredients
- 1 quart of your favorite ice cream (vanilla, chocolate, or any flavor you want)
- 2 cups crushed cornflakes or graham crackers
- 1 teaspoon ground cinnamon
- 2 large eggs, beaten
- Vegetable oil (for frying)
- Optional toppings: wildflower honey, chocolate sauce, whipped cream, and maraschino cherries
Instructions
Step 1: Preparing the Ice Cream Balls
- Using an ice cream scoop, form golf ball-sized scoops (about 6-8) of ice cream and place them on a baking sheet lined with parchment paper.
- Put the baking sheet with the ice cream scoops into the freezer and let them freeze until they are firm and solid (about 1-2 hours).
Step 2: Coating the Ice Cream
- In a shallow dish, mix the crushed cornflakes or graham crackers with the ground cinnamon.
- Take the frozen ice cream scoops from the freezer and quickly roll each ball in the crumb mixture, ensuring they are evenly coated.
- Place the coated ice cream balls back onto the baking sheet lined with parchment paper and return them to the freezer. Allow them to freeze again until they are completely firm (approximately 1 hour).
Step 3: Frying the Ice Cream
- In a deep saucepan or a deep fryer, heat vegetable oil to 375°F (190°C).
- Carefully place the coated ice cream balls into the hot oil one or two at a time, depending on the size of your saucepan, and fry them for about 15-20 seconds until they turn golden brown.
- Using a slotted spoon, gently remove the fried ice cream balls from the oil and place them on a plate lined with paper towels to drain any excess oil.
- If you prefer a thicker crust, you can repeat the frying process once more for each ice cream ball.
- For an extra-crispy crust, you can freeze the balls again after the first frying and then fry them a second time.
Step 4: Serving the Fried Ice Cream
- Once all the ice cream balls are fried to perfection, transfer them to individual dessert dishes.
- You can drizzle wildflower honey, chocolate sauce, or any other desired toppings over the fried ice cream.
- Don't forget to top your creation with a dollop of whipped cream and a maraschino cherry.
Web Story
Step 5: Savoring the Deliciousness
Get ready to indulge in the most delightful dessert experience! Cut into the crispy outer layer of the fried ice cream ball, and let the smooth, creamy goodness inside melt in your mouth. The combination of textures and flavors will leave you craving for more.
Related Posts
Final Thoughts
Fried Ice Cream is an enchanting dessert that transforms a simple scoop of ice cream into a culinary masterpiece. Whether you're hosting a dinner party or simply treating yourself to a delightful dessert, this recipe is sure to impress everyone. I would love to know which flavor that you want to try, let me know in the comments below. Until next time, happy cooking, and enjoy every sweet moment!
Latest Posts

Fried Ice Cream
Indulge in a delightful dessert experience with our Fried Ice Cream recipe! This magical treat combines the creaminess of your favorite ice cream with a crispy fried coating that will leave your taste buds craving more. The golf ball-sized ice cream scoops are coated with crushed cornflakes or graham crackers, adding a perfect contrast of textures and flavors. Served with optional toppings like honey, chocolate sauce, and whipped cream, this sweet symphony of taste is sure to impress your guests and elevate your culinary game. Enjoy the enchantment of Fried Ice Cream with this easy-to-follow recipe
Ingredients
- 1 quart of your favorite ice cream (vanilla, chocolate, or any flavor you adore)
- 2 cups crushed cornflakes or graham crackers
- 1 teaspoon ground cinnamon
- 2 large eggs, beaten
- Vegetable oil (for frying)
- Optional toppings: honey, chocolate sauce, whipped cream, and maraschino cherries
Instructions
STEP 1: PREPARING THE ICE CREAM BALLS
- Using an ice cream scoop, form golf ball-sized scoops of ice cream and place them on a baking sheet lined with parchment paper.
- Put the baking sheet with the ice cream scoops into the freezer and let them freeze until they are firm and solid (about 1-2 hours).
STEP 2: COATING THE ICE CREAM
- In a shallow dish, mix the crushed cornflakes or graham crackers with the ground cinnamon.
- Take the frozen ice cream scoops from the freezer and quickly roll each ball in the crumb mixture, ensuring they are evenly coated.
- Place the coated ice cream balls back onto the baking sheet lined with parchment paper and return them to the freezer. Allow them to freeze again until they are completely firm (approximately 1 hour).
STEP 3: FRYING THE ICE CREAM
- In a deep saucepan or a deep fryer, heat vegetable oil to 375°F (190°C).
- Carefully place the coated ice cream balls into the hot oil one or two at a time, depending on the size of your saucepan, and fry them for about 15-20 seconds until they turn golden brown.
- Using a slotted spoon, gently remove the fried ice cream balls from the oil and place them on a plate lined with paper towels to drain any excess oil.
- If you prefer a thicker crust, you can repeat the frying process once more for each ice cream ball.
- For an extra-crispy crust, you can freeze the balls again after the first frying and then fry them a second time.
STEP 4: SERVING THE FRIED ICE CREAM
- Once all the ice cream balls are fried to perfection, transfer them to individual dessert dishes.
- You can drizzle wildflower honey, chocolate sauce, or any other desired toppings over the fried ice cream.
- Don’t forget to top your creation with a dollop of whipped cream and a maraschino cherry.
Notes
- Recipe yield: The yield for this Fried Ice Cream recipe can vary depending on the size of the ice cream scoops & how many times you choose to repeat the frying process for each ice cream ball. As a general estimate, the recipe is likely to yield around 6 to 8 servings. Feel free to adjust the size of the ice cream scoops and the number of ice cream balls you make to suit your preferences and serving requirements. If you need more or fewer servings, you can easily scale the recipe up or down accordingly.
Recommended Products
As an Amazon Associate and member of other affiliate programs, I earn from qualifying purchases. #CommissionsEarned #ad
-
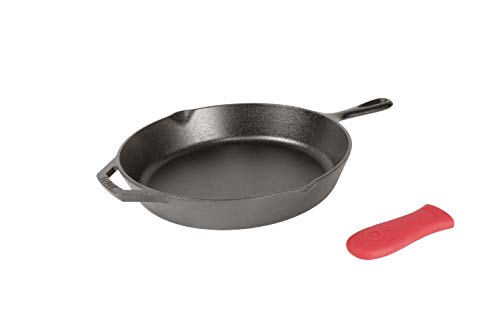
Lodge 12 Inch Cast Iron Skillet. Pre-Seasoned Cast Iron Skillet with Red Silicone Hot Handle Holder.
-
Lodge 14 Inch Cast Iron Wok. Pre-Seasoned Wok with Flattened Bottom for Asian Stir Fry and Sautees
-
STAUB Cast Iron Fry Pan, 12-inch, Cherry
-
T-fal Deep Fryer with Basket, Stainless Steel, Easy to Clean Deep Fryer, Oil Filtration, 2.6-Pound, Silver, Model FR8000
-
Homestia Gold Measuring Cups and Spoons Set Stainless Steel 8 PIECE for Dry and Liquid Ingredients Engraved Measurement Heavy Duty Baking & Cooking Utensils
-
Pyrex Prepware 2-Cup Glass Measuring Cup
-
Creative Co-Op Floral Hand Stamped Stoneware Measuring Cups (Set of 4 Sizes/Designs)
-
DOWAN 4 oz Ramekins - Ramekins for Creme Brulee Porcelain Ramekins Oven Safe, Classic Style Ramekins for Baking Souffle Ramekins Bowls, Set of 6, Blue
-
Spring Chef Ice Cream Scoop with Comfortable Handle, Black
-
Dessert Bowls, 4 Pack Ice Cream Bowl Spoon Set,Frozen Yogurt Cups with Spoons Durable Plastic Candy Color Lovely Dessert Bowl DIY Ice Cream Tools For Festive Party Favor Kids Gift
-
Ice Cream Sundae Kit - 12 Ounce Polka Dot Paper Treat Cups -Heavyweight Plastic Spoons - Paper Straws - Paper Umbrellas - 24 Each - Blue, Pink, Orange, Yellow, Green Outside the Box Papers Brand
-
Solula 18/8 Stainless Steel Small Ice Cream Scoop Disher Cookie Scoop Melon Baller
Nutrition Information:
Yield: 6 Serving Size: 1Amount Per Serving: Calories: 304Total Fat: 14gSaturated Fat: 7gTrans Fat: 0gUnsaturated Fat: 6gCholesterol: 101mgSodium: 179mgCarbohydrates: 39gFiber: 1gSugar: 27gProtein: 6g
Please note that the Calculated Nutrition is an estimate at best. If you make this recipe and love it, remember to stop back and give it a 5-star rating – it helps others find the recipe!
- First published: 7/26/2023
Resources
- Fried Ice Cream (Wikipedia)
- Dandelion Jelly - April 22, 2024
- Nordy Bars - April 14, 2024
- Hot Cross Buns - April 6, 2024












Leave a Reply