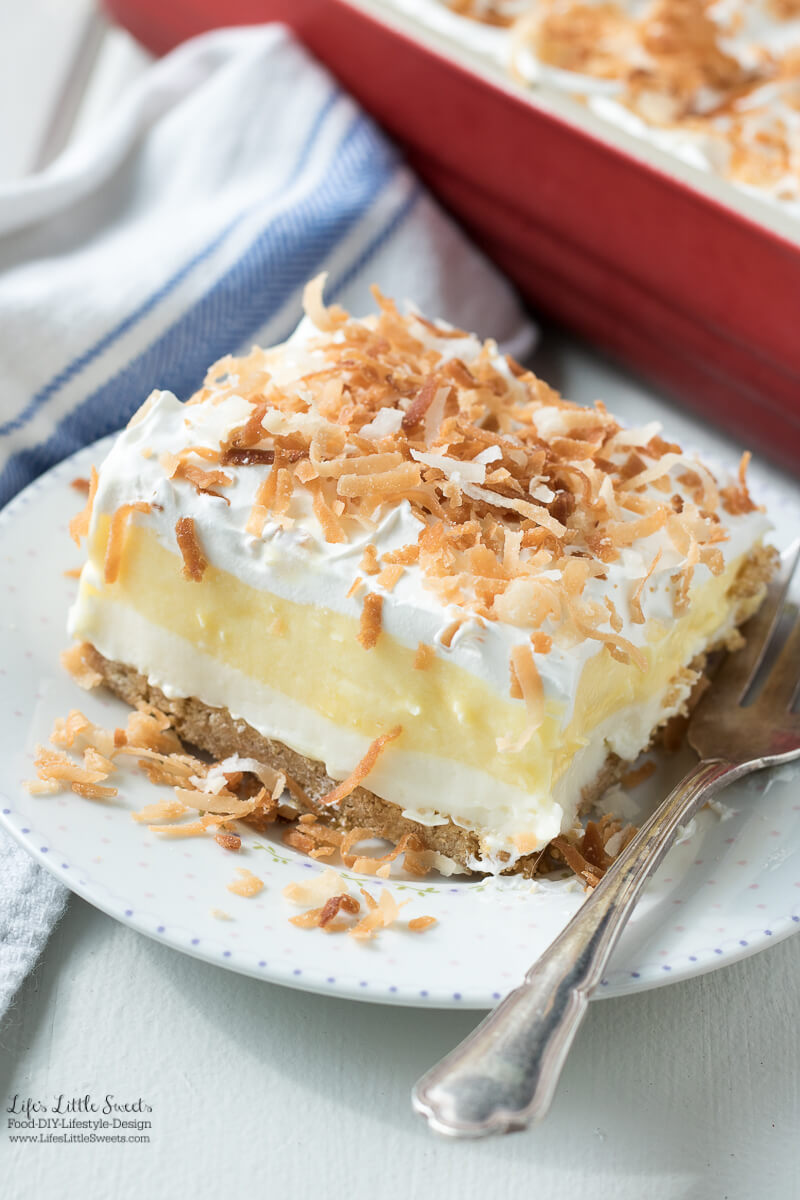
This shop has been compensated by Collective Bias, Inc. and its advertiser. All opinions are mine alone. #HuggiesNewYear #CollectiveBias
Do you ever have extra Huggies wipes boxes on hand? We have found that they make excellent crayon caddies! Organize your children’s crayons with this easy DIY Crayon Caddy made from a Huggies wipes box! Check out the DIY Crayon Caddy step-by-step tutorial along with how I organize diapers in my daughter’s nursery below!
Estimated reading time: 10 minutes
Table of contents
Huggies are the only diaper brand that we have ever purchased since our daughter M. was born 20 months ago. We had been given other brands from her baby shower and the hospital but every time we tried another brand we found that Huggies diapers – no matter which type – proved better in protecting against wetness to keep her nice and dry, thus reducing the chance of diaper rash. I personally find their diapers stronger and easier to put on than other brands and I buy the many of different types available. When she was just born, we used the Huggies Little Snugglers®. We use the Huggies Overnites® which are a MUST for preventing those middle of the night leaks – especially at the toddler stage! When she is in swim class, she uses the Huggies Little Swimmers®. I keep the Huggies Little Movers Slip-On® diapers on hand in my diaper bag & purse because those are easy to put on while she standing up when we are out and about and need to do a quick change on her; I also find that that style is great because she is super active now and they move well with her. There really is a Huggies diaper for every age and stage!
We also use the Huggies wipes and I have purchased and tried on my daughter the different varieties they have which are all good. In my humble opinion, I personally really like the Huggies Natural Care® wipes which are their simplest formula. They are soft and work well for diaper changes. Baby wipes are so handy to have and as a parent , I have discovered they can be used for other things like makeup removal, wiping up messes and dusting surfaces. They have many purposes and do make life a little easier, so I keep them close at hand 🙂
Here’s the story with our DIY Crayon Caddy: Since we have always used Huggies products we would have extra wipes boxes on hand. Our daughter actually started using an empty wipes box to store her crayons many months ago after we first introduced her to crayons & drawing. We found her putting her crayons through the slot at the top and having fun practicing opening and closing the tab. I thought it would be a good idea to put a handle on it to make it easier for her to carry the box around from room to room or to grab for a trip – and that’s how the idea of the DIY Crayon Caddy was born! My daughter loves carrying it around and she definitely knows that’s where the crayons “home” is which is great for clean up time 🙂
One of the great things about using Huggies products is their great Rewards program (you can sign up for it on their website). Every time you get a Huggies product it usually has a Huggies Rewards sticker on the inside, you can enter the codes in your account and they just add up and you can redeem the points on more diapers, toys or whatever they have available in their rewards catalogue and they update it regularly with different offers so it’s never stale which is nice. I always redeem them on toys for my daughter. We have gotten some great quality toys through that program like soft, self-winding race cars and plush puppets. I am glad that they have that because it’s been super fun adding up the rewards and every once and awhile (I like to let the points add up to get the larger ticket toys for my daughter!) getting a free toy(s) in the mail 🙂
[bctt tweet=”Check out this DIY Crayon Caddy #CollectiveBias #ad #HuggiesNewYear”]
As a mom – and really, as a person in general – I think it is a good practice in life to be resourceful, save where I can and find value where I can. I was able to find a great value at Family Dollar by getting a great deal on Huggies diapers and wipes.
⇒All of the great baby items you can get at Family Dollar for an every day low price at Family Dollar 🙂
My Family Dollar Haul
- Huggies Snug & Dry® diapers, 80 count
- Huggies Snug & Dry® diapers, 29 count
- Huggies wipes
When we get a new box of Huggies diapers and wipes, I bring them into the nursery and unpack them. I use these soft storage containers to stow them away on both sides of the room so they are always right at hand in abundance when needed. Its important to me to keep them “stocked” because life happens and sometimes the supply gets low just before we do a restocking and it’s a real pain to run out or be in a “diaper situation” and there’s no diapers within arms reach. In addition to the nursery, I keep 4-6 diapers in the diaper bag and 2-4 diapers in my purse along with Huggies wipes in both bags. I have a Huggies box of wipes in the kitchen/dining/living room area and I keep any overflow supplies in our hallway closet just outside the nursery in a centralized location of the house. When it comes to diapers & wipes, I become a total “prepper” for any kind of situation that may arise:)
DIY Crayon Caddy Tutorial
Step 1 | Gather your Materials
- 1 Huggies wipe box – or more if you want to make multiple Crayon Caddys!
- 1″ webbing (24″ in length) – I used 1″ green nylon webbing which I had on hand. Webbing comes in many different sizes and colors, I think that 1″ is a good all around size for handling but feel free to use a thicker or thinner size if you prefer. Webbing can be made from different materials like 100% cotton/nylon/polyester and can be found in any craft store. For the length, I would have at least 24″ in case you want to make more of a shoulder strap (like we did) for your child or adjust it later on.
- Drill with appropriate drill bits – the bit needs to be large enough to make a hole for the webbing to fit through. **please make sure an adult handles this part!**
- A permanent marker – to mark the sides where you will be drilling the holes for the handle
- Scissors – for cutting the webbing. **please make sure an adult handles this part!**
- Lighter or matches *optional – for sealing off the webbing (only if it is made out of nylon), this keeps the webbing from fraying but it’s not completely necessary but makes for more neat appearance overall (and then you don’t have to deal with it fraying later on). **please make sure an adult handles this part!**
- Crayons – to populate your new Crayon Caddy!
Step 2 | Drill Holes
- We used 2 drill bits a 1/4″ and 1/2″ but this step can totally be done with 1 drill bit. We made the hole a little larger than it needs to be – as long as you can fold the webbing through the hole, that’s all that matters. The webbing makes a pretty large knot, so we did not have any issues with it coming through and it can always be double-knotted, if need be.
Step 3 | Add Handle
- Thread webbing through one side of the caddy from the outside in, then make a knot on the inside.
- Thread the other end of the webbing through the other hole and before making the knot make sure it is a sufficient length. I would allow for a little extra length, in case you want to make it longer later. Make the 2nd knot.
- Optional: If using nylon webbing, using a match, seal off the end.
- Tip: This is a great time to sort through all your crayons and put aside the broken ones (check out my post on making new crayons from broken ones)
[bctt tweet=”DIY Crayon Caddy #CollectiveBias #ad #HuggiesNewYear”]
- You can find the Family Dollar store locator here
- Check out Huggies® on Facebook and Huggies® on Twitter
- Special thanks to my husband, Eric, for lending his drill, drill bits & helpful assistance for this project! Special thanks, also, to my daughter M. for her participation and enthusiasm with this fun project!
- Special Thanks to Family Dollar and Huggies® for sponsoring this post, we have been long-time appreciators of Huggies products and before me, my mom when she was raising me and my sister with her family! That’s 3 generations of using Huggies products right there 🙂
- Sharing is caring, if you like this post, DIY Crayon Caddy, please share using the links at the bottom of this post or the share buttons to the left of the screen.
What are your favorite ways to organize crayons & art supplies? Do you love Huggies diapers & wipes for your kiddos too? Let me know in the comments below!
- Freezer Meal Prep - September 25, 2023
- Ted Lasso Biscuit Recipe - September 25, 2023
- Stuffed Dates Recipes - September 25, 2023
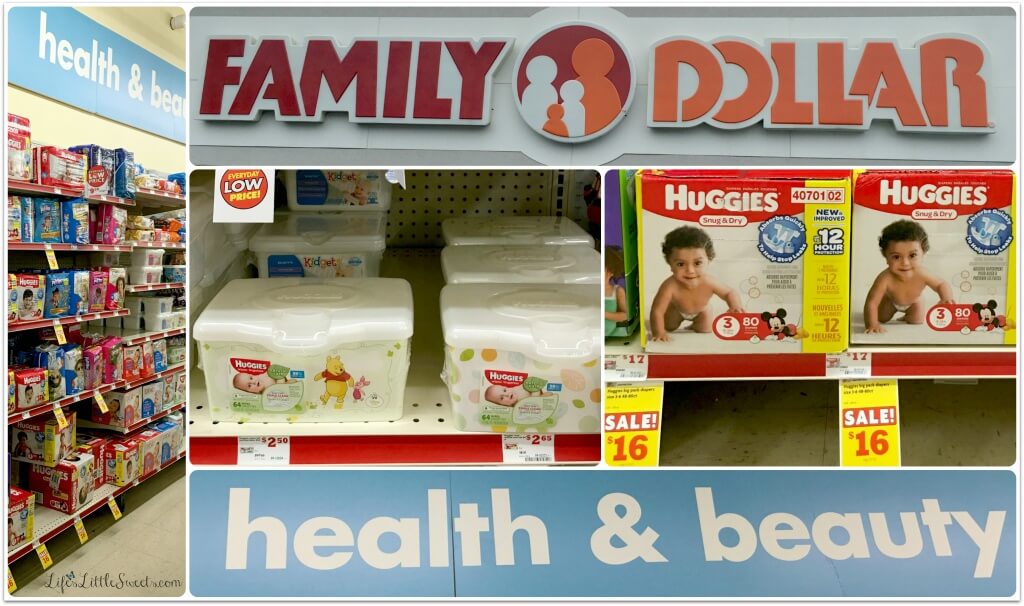
Huggies were the only brand that I ever use for my daughter, too. They just proved to be the best.
Thanks Joanne for commenting! I agree with you, I am big into researching brands and I always kept going with Huggies because they just work so well. I’ve never had a problem and I’ve been really happy with them! Thank you for visiting my blog!
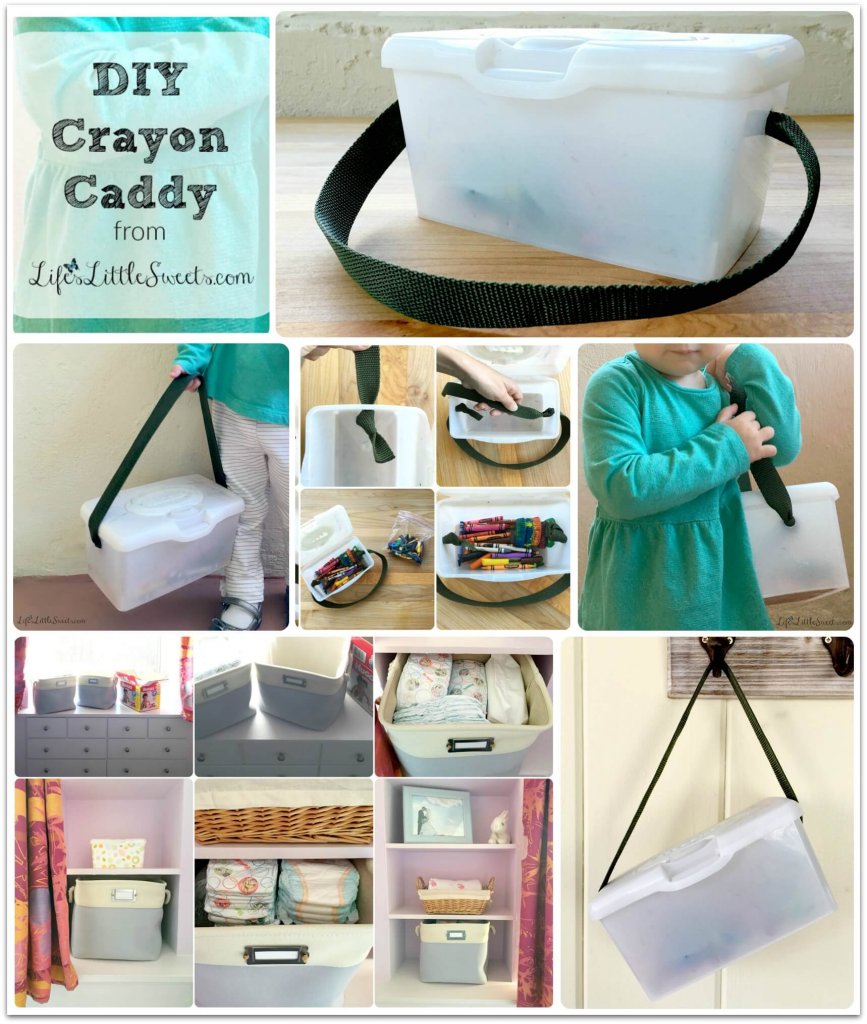
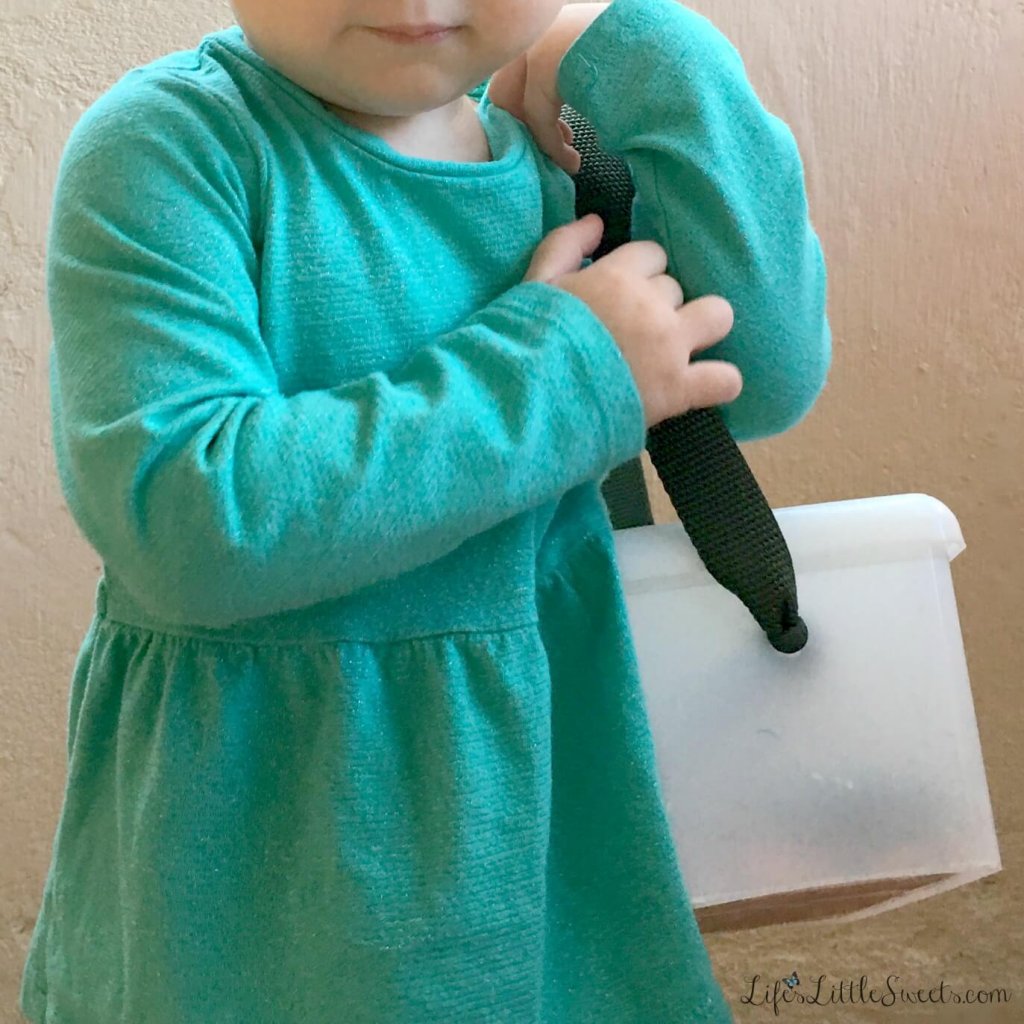
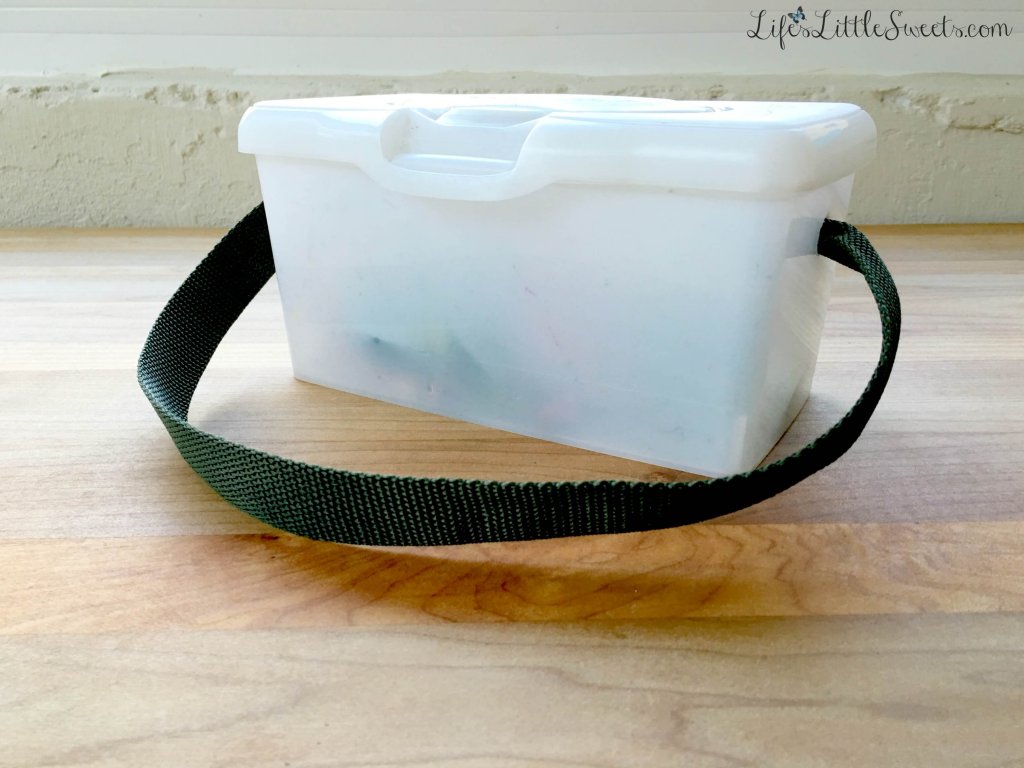
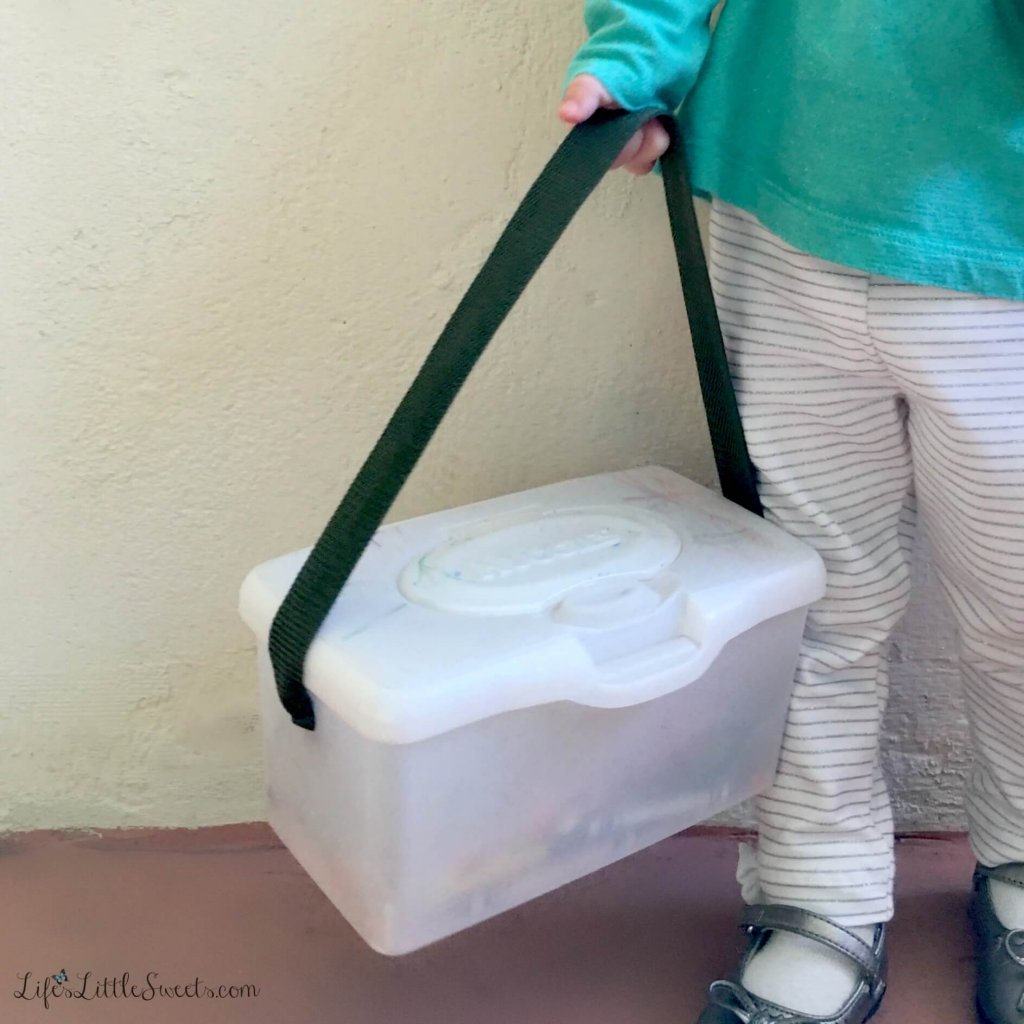
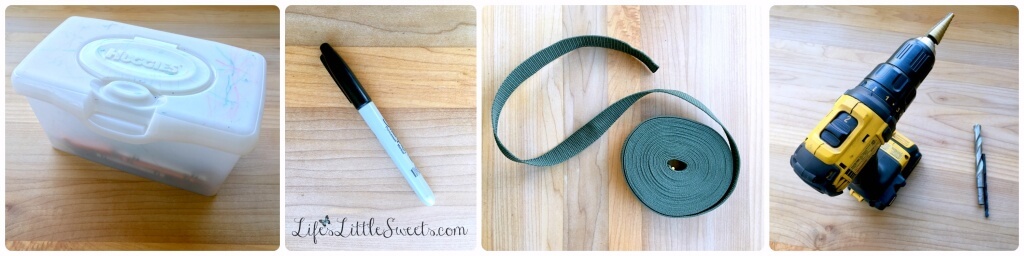
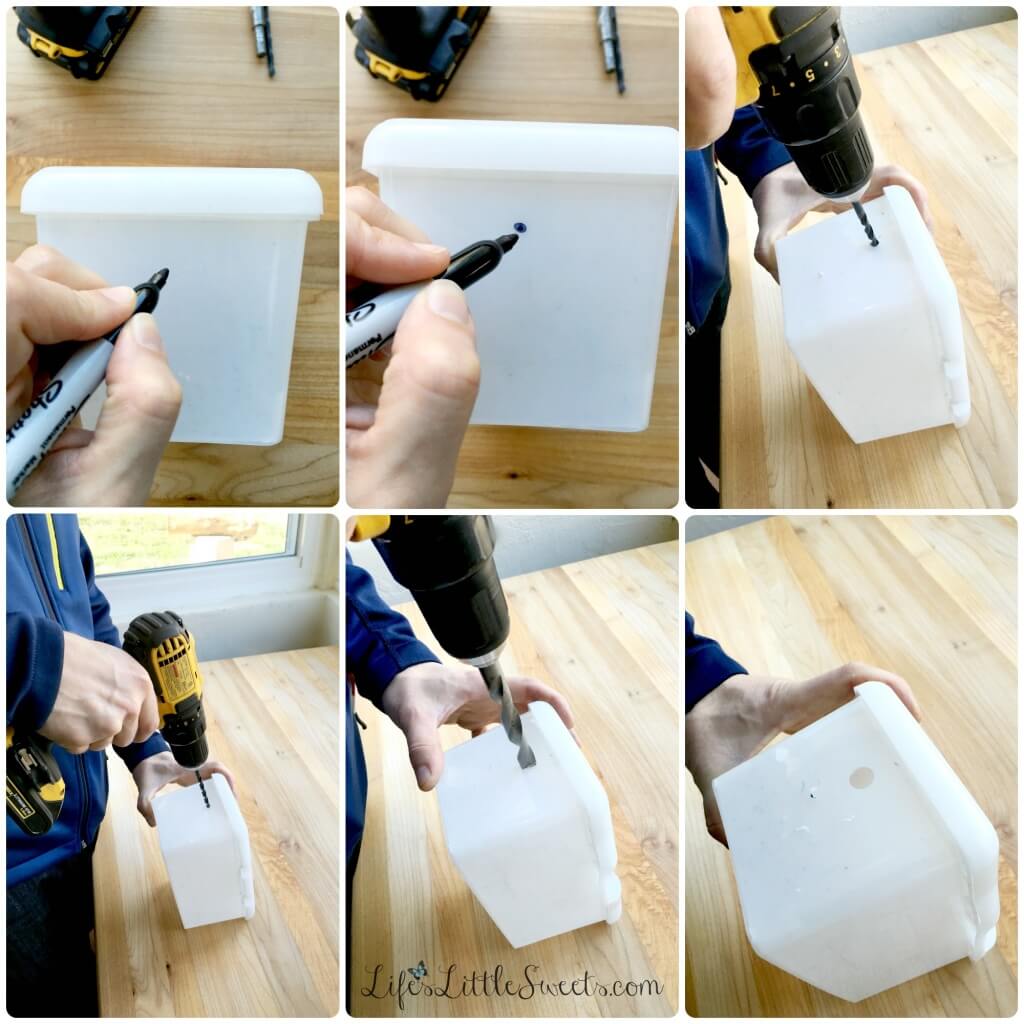
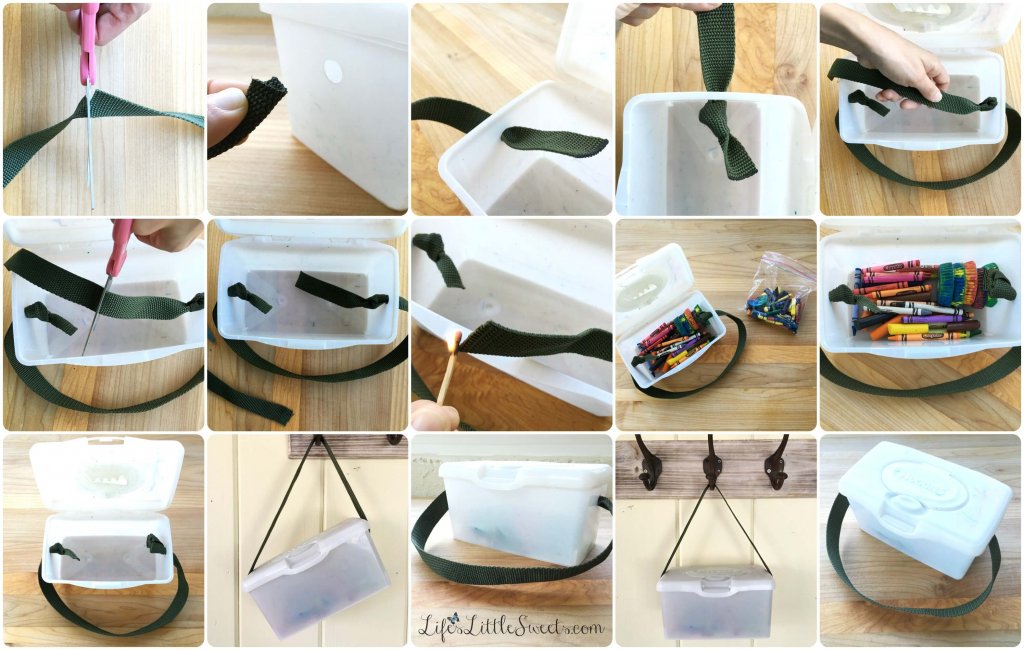
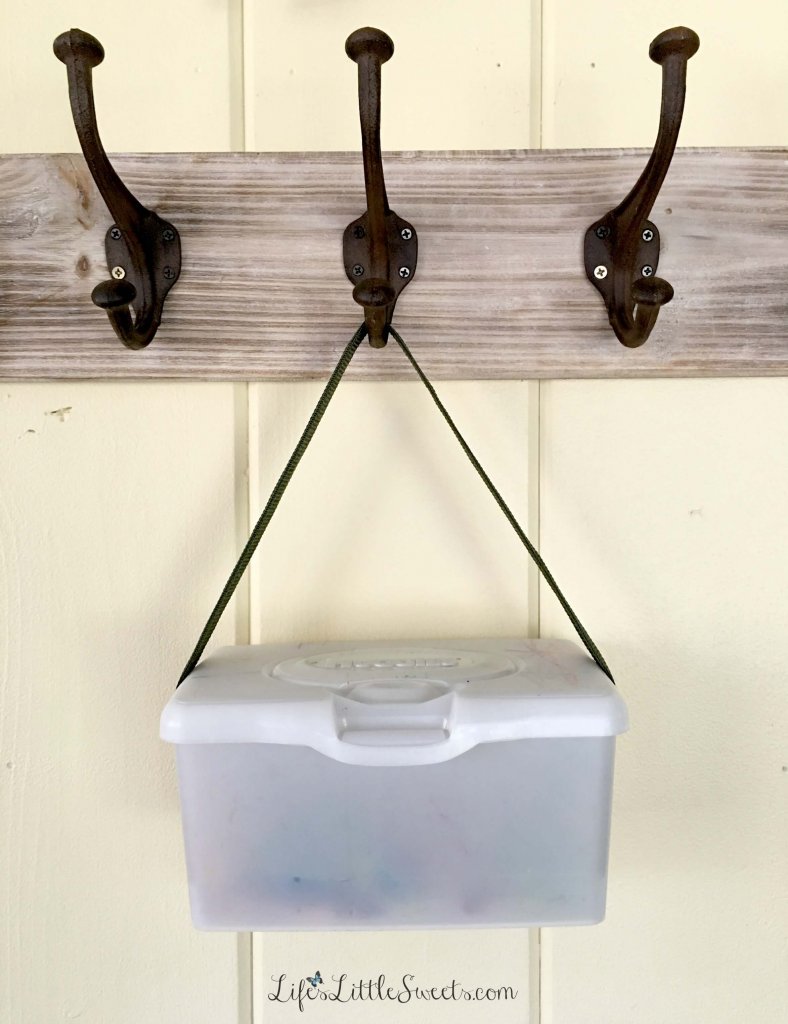
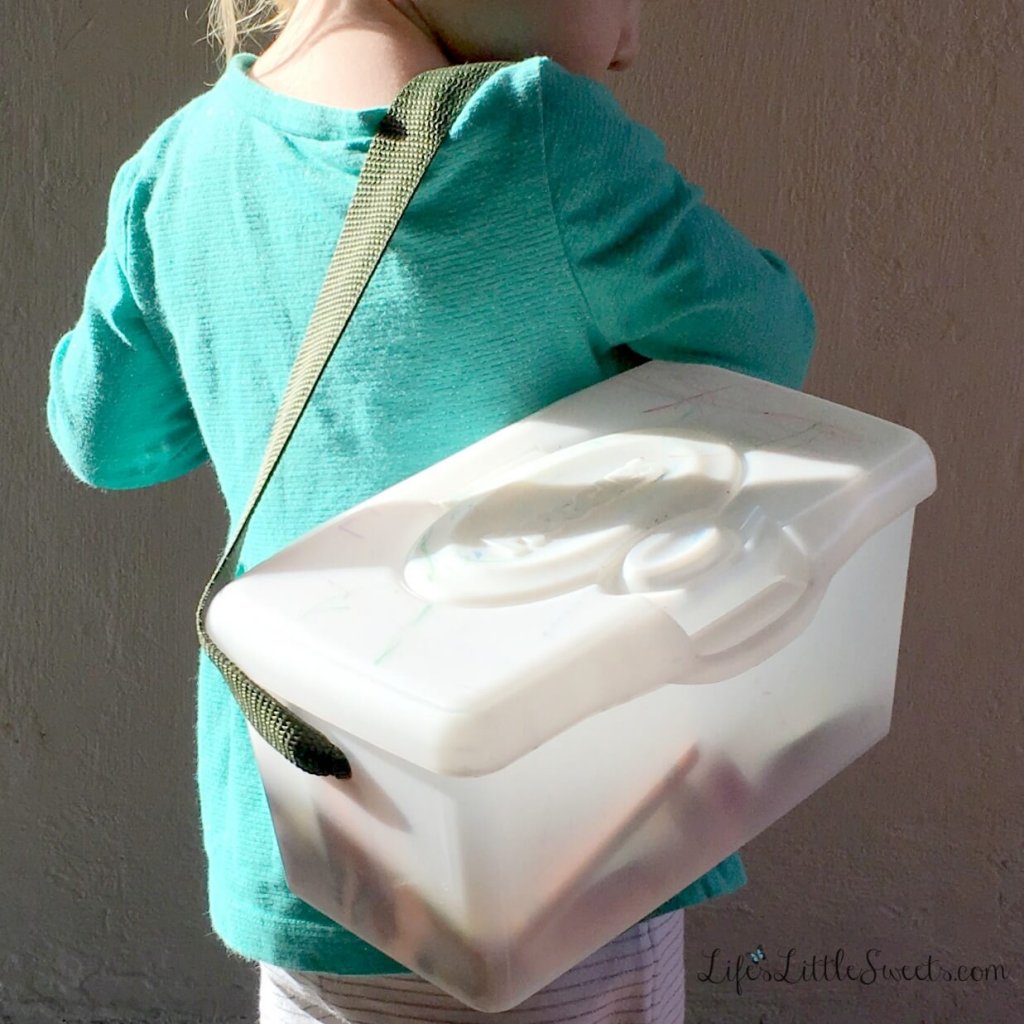
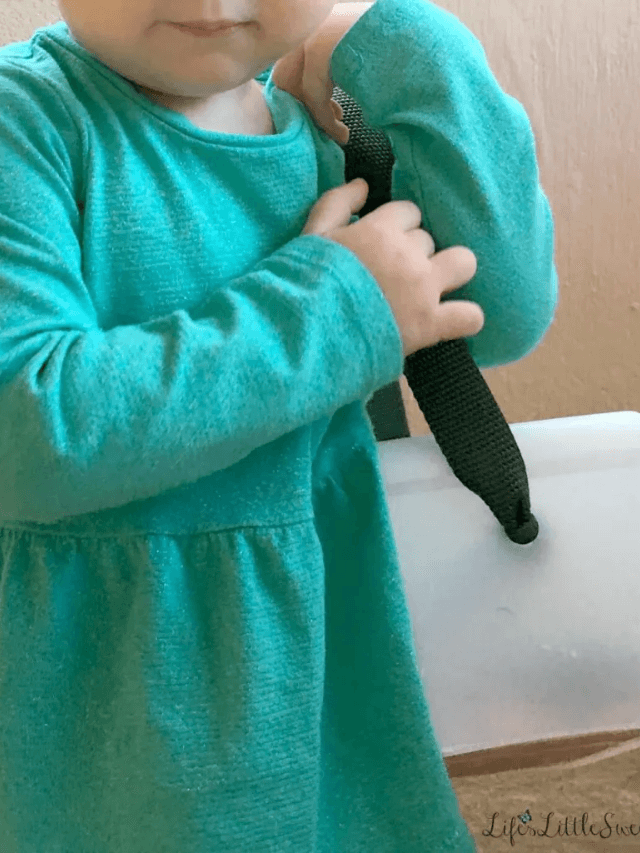
This is such a neat idea! We use them for storage, but I have never added a strap. Cool! [client]
Hi Melanie, yeah the strap allows my daughter to carry it around more easily even if it’s filled with crayons. Thank you for visiting and commenting!
Hi Sara, that container DIY project you did is so clever. Huggies is definitely one of the only 2 brands I used when our kids were little.
Hi Tee, thank you so much and thank you for visiting!
This is sooooo smart! As many times as I’ve spilled (or the kids have) the crayons or marker basket, you’d think I would have thought of doing something like this. Nope, YOU are the smart one. Love it!
Hi Liz, thank you so much! I am so glad that you love this DIY, it was very fun to make something for my daughter to use. Thank you for visiting!
This is a great idea. I love repurposing things. I am have to make one of these for my grand daughter.
Chris
Hi Chris, yes I am all about repurposing things too! Thank you for visiting!