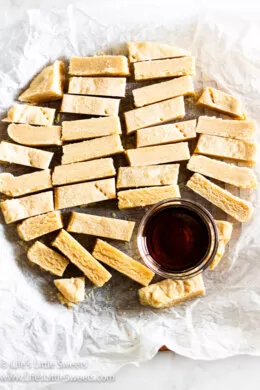
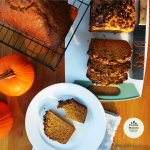
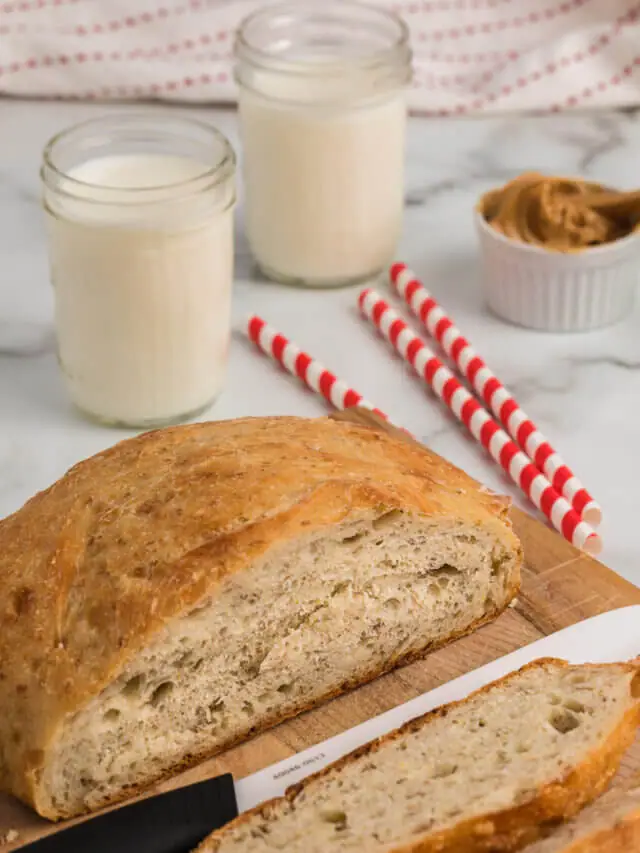
Estimated reading time: 6 minutes
If you’re looking to add a burst of fresh flavor, nutrition, and color to your meals, look no further than microgreens! These tiny greens are the seedlings of edible plants that are harvested at an early stage, typically within 1-3 weeks of germination. Microgreens come in a variety of flavors and colors, from spicy arugula to sweet pea shoots, and are packed with vitamins, minerals, and antioxidants. Growing your own microgreens at home is easy, fun, and cost-effective, and in this guide, we’ll show you everything you need to know to get started.
How to Grow Microgreens: A Comprehensive Guide
Table of contents
As someone who loves to cook and create delicious dishes, I have found that adding fresh microgreens to my meals has taken my cooking to the next level. Not only do microgreens add a pop of color and texture, but they also pack a powerful punch of flavor and nutrition. And the best part? You can easily grow them at home, no matter where you live or how much space you have. In this comprehensive guide, I will show you how to grow microgreens from start to finish.
What are Microgreens?
Microgreens are the young, tender shoots of edible plants that are harvested at the seedling stage, typically within 1-3 weeks of germination. These tiny greens are packed with vitamins, minerals, and antioxidants, making them a nutritious addition to any meal. They come in a variety of flavors and colors, from peppery arugula to sweet pea shoots.
Why Grow Your Own Microgreens?
Growing your own microgreens has many benefits, including:
- Freshness: Microgreens are best eaten fresh, and by growing your own, you can ensure that they are as fresh as possible.
- Convenience: You can grow microgreens in a small space, such as on a windowsill, and they require minimal maintenance.
- Cost: Growing your own microgreens is much more cost-effective than buying them at the grocery store.
- Variety: By growing your own microgreens, you can experiment with different varieties and flavors that may not be available at your local grocery store.
What are popular microgreen varieties to grow?
There are many popular microgreen varieties that you can grow at home. Here are a few:
- Arugula: Arugula microgreens have a peppery, spicy flavor and are a great addition to salads, sandwiches, and pizzas.
- Radish: Radish microgreens have a spicy, tangy flavor and are high in vitamin C and antioxidants.
- Broccoli: Broccoli microgreens have a mild, slightly sweet flavor and are packed with vitamins and minerals, including vitamin C and calcium.
- Sunflower: Sunflower microgreens have a nutty, earthy flavor and are rich in protein, fiber, and healthy fats.
- Pea shoots: Pea shoot microgreens have a sweet, delicate flavor and are high in vitamin C, folate, and fiber.
- Beet: Beet microgreens have a sweet, earthy flavor and are high in vitamin C, iron, and magnesium.
- Cilantro: Cilantro microgreens have a fresh, citrusy flavor and are a great addition to Mexican and Asian dishes.
- Basil: Basil microgreens have a sweet, spicy flavor and are a great addition to salads, sandwiches, and pasta dishes.
These are just a few of the many microgreen varieties you can grow at home. Experiment with different varieties to find the ones that you enjoy the most!
Getting Started
Before you begin growing microgreens, you will need a few supplies:
- Microgreen seeds: You can purchase microgreen seeds online or at your local garden center. Popular varieties include arugula, broccoli, radish, and sunflower.
- Growing medium: Microgreens can be grown in soil or a soilless growing medium, such as coconut coir or vermiculite.
- Containers: You can use a variety of containers to grow microgreens, including plastic trays, pots, or even recycled containers, such as egg cartons.
- Light source: Microgreens require plenty of light to grow, so you will need a sunny windowsill or a grow light.
Step-by-Step Guide to Growing Microgreens
- Fill your container with a growing medium. If using soil, fill the container to about 1 inch from the top. If using a soilless growing medium, fill the container to about ½ inch from the top.
- Moisten the growing medium with water.
- Sprinkle the microgreen seeds evenly over the growing medium. For small seeds, you can use a shaker bottle to distribute them evenly.
- Press the seeds lightly into the growing medium. This will help ensure good seed-to-soil contact.
- Cover the seeds with a thin layer of soil or a growing medium. For larger seeds, you can skip this step.
- Water the seeds gently with a spray bottle or watering can.
- Place the container in a sunny location or under a grow light.
- Keep the growing medium moist but not waterlogged. Water when the top layer of soil feels dry to the touch.
- In 1-3 weeks, your microgreens will be ready to harvest! Use scissors to cut the microgreens just above the soil line.
Tips for Success
- Start small: Begin with just one or two varieties of microgreens until you get the hang of it.
- Harvest often: Harvesting your microgreens frequently will encourage new growth.
- Experiment with different growing mediums: Try growing microgreens in soil, coconut coir, vermiculite, or even on a wet paper towel.
- Don’t overcrowd your seeds: Be sure to sprinkle!
Web Story
Related Posts
Latest Posts
How To Grow Microgreens
Learn how to grow microgreens at home and add a burst of fresh flavor and nutrition to your meals! Our comprehensive guide covers popular varieties, planting and care tips, and creative ways to incorporate microgreens into your dishes. Perfect for anyone looking to add a healthy and delicious twist to their cooking.
Materials
- Seeds: Choose high-quality, organic seeds that are specifically labeled for microgreen use.
- Soil or growing medium: Use a high-quality potting soil or growing medium specifically designed for microgreens.
Tools
- Seed trays or containers: You can use plastic or biodegradable seed trays, or recycled containers like egg cartons or yogurt cups.
- Watering can or spray bottle: Microgreens require frequent watering, so you'll need a watering can or spray bottle to keep them moist.
- Light source: Microgreens require ample light to grow properly, so you'll need a sunny window or grow light.
Optional tools that can be helpful include:
Instructions
- Fill your container with growing medium. If using soil, fill the container to about 1 inch from the top. If using a soilless growing medium, fill the container to about ½ inch from the top.
- Moisten the growing medium with water.
- Sprinkle the microgreen seeds evenly over the growing medium. For small seeds, you can use a shaker bottle to distribute them evenly.
- Press the seeds lightly into the growing medium. This will help ensure good seed-to-soil contact.
- Cover the seeds with a thin layer of soil or growing medium. For larger seeds, you can skip this step.
- Water the seeds gently with a spray bottle or watering can.
- Place the container in a sunny location or under a grow light.
- Keep the growing medium moist but not waterlogged. Water when the top layer of soil feels dry to the touch.
- In 1-3 weeks, your microgreens will be ready to harvest! Use scissors to cut the microgreens just above the soil line.
Notes
Tips for Success
- Start small: Begin with just one or two varieties of microgreens until you get the hang of it.
- Harvest often: Harvesting your microgreens frequently will encourage new growth.
- Experiment with different growing mediums: Try growing microgreens in soil, coconut coir, vermiculite, or even on a wet paper towel.
- Don't overcrowd your seeds: Be sure to sprinkle!
Recommended Products
As an Amazon Associate and member of other affiliate programs, I earn from qualifying purchases. #CommissionsEarned #ad
-
Kitchen Shears, iBayam Kitchen Scissors Heavy Duty Meat Scissors Poultry Shears, Dishwasher Safe Food Cooking Scissors All Purpose Stainless Steel Utility Scissors, 2-Pack (Black Red, Black Gray)
-
GooingTop LED Grow Light,6000K Full Spectrum Clip Plant Growing Lamp with White Red LEDs for Indoor Plants,5-Level Dimmable,Auto On Off Timing 4 8 12Hrs
-
SONKIR Soil pH Meter, MS02 3-in-1 Soil Moisture/Light/pH Tester Gardening Tool Kits for Plant Care, Great for Garden, Lawn, Farm, Indoor & Outdoor Use (Green)
-
MET Certified 2 Pack Seedling Heat Mat, Seedfactor Waterproof Durable Germination Station Heat Mat, Warm Hydroponic Heating Pad for Indoor Home Gardening Seed Starter(10" X 20")
-
Pack of 150 pcs Germinating Growing Paper Seed Sprouter Vegetable Microgreens Planting Paper 7.8" x 11.4". Fit for Plant Germination Tray (13.4"x 9.8") Trays NOT Included
-
Superfood Microgreen Seeds Mix | for Microgreens Growing Trays | 1 LB | Heirloom Non GMO Purple Kohlrabi, Collard, Radish, Turnip & Broccoli Sprouts Seeds | Rainbow Heirloom Seed Co.
-
Hula Home Continuous Spray Bottle (10.1oz/300ml) Empty Ultra Fine Plastic Water Mist Sprayer – For Hairstyling, Cleaning, Salons, Plants, Essential Oil Scents & More - Green
-
Envelor Coco Grow Mat for Microgreen Seedlings Trays Hydroponic Growing Pads Sprouting Tray Coconut Fiber Seed Starter Planting Sheets Natural Coco Coir Liner - 9 x 9 Inches, 10 Pack
-
Microgreens Seeds Kit – Micro Greens Sprout Seeds Variety 5 Pack – Includes Broccoli, Radish, Peas, Spicy and Mild Mix Microgreen Seeds for Planting and Sprouting Indoor – 100% Non-GMO
-
Microgreens Growing Kit Self Watering - Includes Microgreens Tray, Microgreens Seeds, Mats and Bamboo Surround. No Soil Needed. Easy to Set up. Sprouting Kit that water once. Guaranteed to Grow.
- First published: 4/23/2023
- Cheez-It Toffee - December 1, 2023
- Apple Crisp - November 30, 2023
- Pretzel Toffee - November 30, 2023
Leave a Reply